
| Type: | F1 |
| Country: | South Africa |
| Flag Suffix: | 1928 |
| Grand Prix: | South African |
| Date: | 7 March |
| Year: | 1970 |
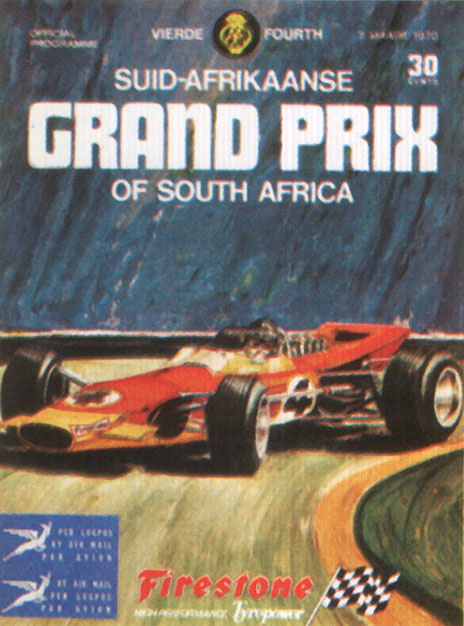
| Official Name: | Fourth AA Grand Prix of South Africa |
| Location: | Kyalami, Midrand, Transvaal Province, South Africa |
| Course: | Permanent racing facility |
| Course Mi: | 2.550 |
| Course Km: | 4.104 |
| Distance Laps: | 80 |
| Distance Mi: | 204.009 |
| Distance Km: | 328.320 |
| Weather: | Very hot, Dry |
| Pole Driver: | Jackie Stewart |
| Pole Team: | March-Ford |
| Pole Time: | 1:19.3 |
| Pole Country: | United Kingdom |
| Fast Time: | 1:20.8 |
| Fast Driver: | Jack Brabham |
| Fast Team: | Brabham-Ford |
| Fast Country: | Australia |
| Fast Lap: | 71 |
| First Driver: | Jack Brabham |
| First Team: | Brabham-Ford |
| First Country: | Australia |
| Second Driver: | Denny Hulme |
| Second Team: | McLaren-Ford |
| Second Country: | New Zealand |
| Third Driver: | Jackie Stewart |
| Third Team: | March-Ford |
| Third Country: | United Kingdom |
The 1970 South African Grand Prix, formally titled the Fourth AA Grand Prix of South Africa (Afrikaans: Vierde AA Suid-Afrikaanse Grand Prix[1]), was a Formula One motor race held at Kyalami Circuit on 7 March 1970. It was race 1 of 13 in both the 1970 World Championship of Drivers and the 1970 International Cup for Formula One Manufacturers. It was also the 14th and last Formula One victory for triple world champion Jack Brabham, and at age 43, was the last driver to win a Formula One race over the age of 40 until Nigel Mansell at the 1994 Australian Grand Prix.[2]
Two time World Champion and five time Monaco Grand Prix winner Graham Hill, driving a Lotus 49C for Rob Walker, made his return to racing after a life-threatening crash in the 1969 United States Grand Prix. Despite extensive knee surgery that left Hill with minimal mobility, he finished sixth. Hill rated this achievement as among his finest. After the race, he could not get out of the car by himself and had to be lifted out.[3]
| Pos | No | Driver | Constructor | Team | Time | Gap | |
|---|---|---|---|---|---|---|---|
| 1 | 1 |  Jackie Stewart Jackie Stewart | March-Ford | Tyrrell Racing Organisation | 1:19.3 | ||
| 2 | 15 |  Chris Amon Chris Amon | March-Ford | March Engineering | 1:19.3 | - | |
| 3 | 12 |  Jack Brabham Jack Brabham | Brabham-Ford | Motor Racing Developments Ltd | 1:19.6 | +0.3 | |
| 4 | 9 |  Jochen Rindt Jochen Rindt | Lotus-Ford | Gold Leaf Team Lotus | 1:19.9 | +0.6 | |
| 5 | 17 |  Jacky Ickx Jacky Ickx | Ferrari | Scuderia Ferrari SpA SEFAC | 1:20.0 | +0.7 | |
| 6 | 6 | Denny Hulme | McLaren-Ford | Bruce McLaren Motor Racing | 1:20.1 | +0.8 | |
| 7 | 7 | John Surtees | McLaren-Ford | Team Surtees | 1:20.2 | +0.9 | |
| 8 | 3 |  Jean-Pierre Beltoise Jean-Pierre Beltoise | Matra | Equipe Matra Elf | 1:20.2 | +0.9 | |
| 9 | 16 |  Jo Siffert Jo Siffert | March-Ford | March Engineering | 1:20.2 | +0.9 | |
| 10 | 5 | Bruce McLaren | McLaren-Ford | Bruce McLaren Motor Racing | 1:20.3 | +1.0 | |
| 11 | 8 |  Mario Andretti Mario Andretti | March-Ford | STP Corporation | 1:20.5 | +1.2 | |
| 12 | 19 | Jackie Oliver | BRM | Owen Racing Organisation | 1:20.9 | +1.6 | |
| 13 | 25 |  Dave Charlton Dave Charlton | Lotus-Ford | Scuderia Scribante | 1:20.9 | +1.6 | |
| 14 | 10 | John Miles | Lotus-Ford | Gold Leaf Team Lotus | 1:21.0 | +1.7 | |
| 15 | 14 |  Rolf Stommelen Rolf Stommelen | Brabham-Ford | Auto Motor Und Sport | 1:21.2 | +1.9 | |
| 16 | 20 |  Pedro Rodríguez Pedro Rodríguez | BRM | Owen Racing Organisation | 1:21.3 | +2.0 | |
| 17 | 2 | Johnny Servoz-Gavin | March-Ford | Tyrrell Racing Organisation | 1:21.4 | +2.1 | |
| 18 | 4 | Henri Pescarolo | Matra | Equipe Matra Elf | 1:21.5 | +2.2 | |
| 19 | 11 | Graham Hill | Lotus-Ford | Rob Walker Racing Team | 1:21.6 | +2.3 | |
| 20 | 22 | Piers Courage | De Tomaso-Ford | Frank Williams Racing Cars | 1:22.0 | +2.7 | |
| 21 | 24 | Peter de Klerk | Brabham-Ford | Team Gunston | 1:22.7 | +3.4 | |
| 22 | 23 | John Love | Lotus-Ford | Team Gunston | 1:23.1 | +3.8 | |
| 23 | 21 |  George Eaton George Eaton | BRM | Owen Racing Organisation | 1:24.6 | +5.3 |
| Pos | No | Driver | Constructor | Laps | Time/Retired | Grid | Points | |
|---|---|---|---|---|---|---|---|---|
| 1 | 12 | Jack Brabham | Brabham-Ford | 80 | 1:49:34.6 | 3 | 9 | |
| 2 | 6 | Denny Hulme | McLaren-Ford | 80 | +8.1 | 6 | 6 | |
| 3 | 1 | Jackie Stewart | March-Ford | 80 | +17.1 | 1 | 4 | |
| 4 | 3 | Jean-Pierre Beltoise | Matra | 80 | +1:13.1 | 8 | 3 | |
| 5 | 10 | John Miles | Lotus-Ford | 79 | +1 lap | 14 | 2 | |
| 6 | 11 | Graham Hill | Lotus-Ford | 79 | +1 lap | 19 | 1 | |
| 7 | 4 | Henri Pescarolo | Matra | 78 | +2 laps | 18 | ||
| 8 | 23 | John Love | Lotus-Ford | 78 | +2 laps | 22 | ||
| 9 | 20 | Pedro Rodríguez | BRM | 76 | +4 laps | 16 | ||
| 10 | 16 | Jo Siffert | March-Ford | 75 | +5 laps | 9 | ||
| 11 | 24 | Peter de Klerk | Brabham-Ford | 75 | +5 laps | 21 | ||
| 12 | 25 | Dave Charlton | Lotus-Ford | 73 | Engine | 13 | ||
| 13 | 9 | Jochen Rindt | Lotus-Ford | 72 | Engine | 4 | ||
| Ret | 17 | Jacky Ickx | Ferrari | 60 | Engine | 5 | ||
| Ret | 7 | John Surtees | McLaren-Ford | 60 | Engine | 7 | ||
| Ret | 21 | George Eaton | BRM | 58 | Engine | 23 | ||
| Ret | 2 | Johnny Servoz-Gavin | March-Ford | 57 | Engine | 17 | ||
| Ret | 5 | Bruce McLaren | McLaren-Ford | 39 | Engine | 10 | ||
| Ret | 22 | Piers Courage | De Tomaso-Ford | 39 | Accident | 20 | ||
| Ret | 8 | Mario Andretti | March-Ford | 26 | Overheating | 11 | ||
| Ret | 14 | Rolf Stommelen | Brabham-Ford | 23 | Engine | 15 | ||
| Ret | 19 | Jackie Oliver | BRM | 22 | Gearbox | 12 | ||
| Ret | 15 | Chris Amon | March-Ford | 14 | Overheating | 2 | ||
| DNS | 11 | Brian Redman | Lotus-Ford | Car raced by Graham Hill | ||||
| Pos | Driver | Points | ||
|---|---|---|---|---|
| 1 | Jack Brabham | 9 | ||
| 2 | Denny Hulme | 6 | ||
| 3 | Jackie Stewart | 4 | ||
| 4 | Jean-Pierre Beltoise | 3 | ||
| 5 | John Miles | 2 | ||
| Source:[4] | ||||
| Pos | Constructor | Points | ||
|---|---|---|---|---|
| 1 | Brabham-Ford | 9 | ||
| 2 | McLaren-Ford | 6 | ||
| 3 | March-Ford | 4 | ||
| 4 | Matra | 3 | ||
| 5 | Lotus-Ford | 2 | ||
| Source: | ||||